Bow Tuning – Initial Setup
Bow Tuning – Initial Setup
In our scenario lets start with a brand new bow, right out of the box.
Tuning your bow starts with a of couple simple basics. One is the best shot form possible. If you’re unsure of proper stance, grip or trigger control spend some time with a coach. Does it really matter? I’ve experienced 4″ nock tear differences (more on nock tear later) between an arrow I shot as compared to another shooter when shooting the same bow.
The other basic part of setting up your bow is the position of the rest and D-loop. Once your rest is installed and positioned so that the center of your arrow goes through the center of your berger hole (the rest mounting bolt hole) tie on the D-Loop so that the arrow is a 90 degree angle to the string ensuring that the arrow is still centered in the berger button hole. This completes the up/down adjustment of the rest. Now, on to the left/right adjustment.
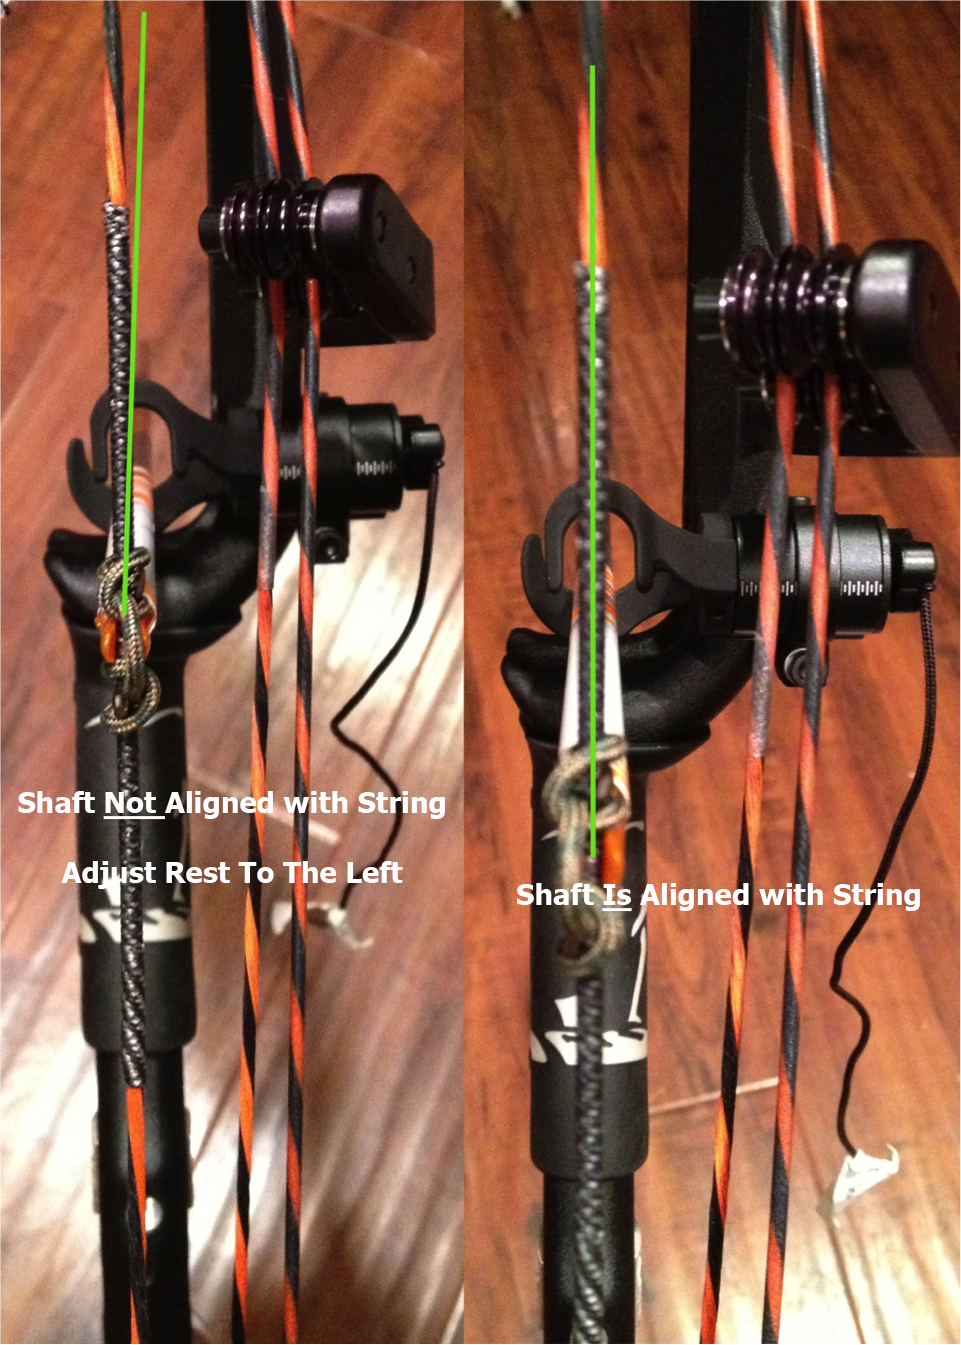
With an arrow nocked and the rest in the full up position, if you’re using a drop-away rest, make the initial center-shot adjustment. Position the bow in front of you so that the string is  inline with the center of your bows grip. While keeping the string in the center of the grip adjust the rest, left or right, so that the arrow is inline with the bow string. Click on the image (it will open in another window). The green line on the left side of the image is aligned with the center of the arrow. Note that it shows a rest that is adjusted too far to the right. The image on the right shows the arrow in line with the string and the string is in the center of the grip – all is good. This completes the initial setup. It’s almost time for Paper Tuning.
Cut your arrow to the desired length. For me this is at the rest plus 1″. I want to jump out of bow tuning and briefly address arrow setup. There are a few things that are crucial to good arrow flight. Shooting the straightest shafts that you can afford (I use .001”), ensure that the arrow point is centered in the shaft and use stiff vanes. I check the point by spinning the arrow on an arrow inspector, 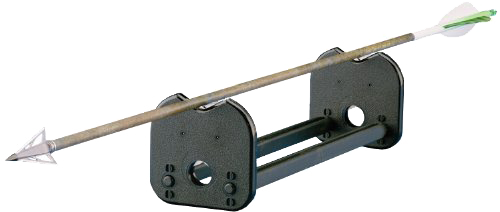 I look for any point wobble. If I notice any wobble I heat the point insert and twist it slightly, then retest. This is one reason I NEVER use Krazy Glue on inserts – it can’t be adjusted. If you’re shooting micro diameter shafts, such as Black Eagle Deep Impact, which use an outsert that is epoxied in, perform this step before the epoxy cures.
Do the checking with your field points and broadheads. You may find that you have a field point or broadhead ferrel that isn’t straight. If the point isn’t in the center of the shaft the arrow won’t fly straight.
A note on vane selection. Shoot the stiffest vanes you can find. Remember that you’re 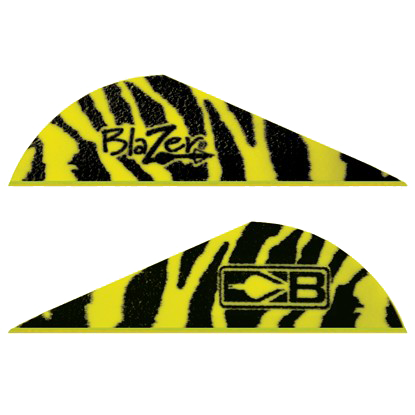
building a missile. In all my years in the military I never saw a real missile that had
flexible/wimpy/flappy fins. My recommendations are Duravane Fusion Vanes or Blazer Vanes by Bohning.
Now, back to tuning… With your preferred weight field point installed, set your bow to its maximum draw weight.
With perfect shooting form shoot one arrow through paper at a distance of 4 to 5 feet. Correct any nock high/low paper tear first by adjusting the rest in the direction you want to move the point. If the point is low (nock is high), raise the rest. If the point is high, lower the rest. Make this adjustment until there is no more nock high/low tears. Raise/lower your D-loop and/or rest while ensuring that your arrow is still centered in the berger button hole and at a 90 degree angle to the string. If this is not the case and you own a bow with 2 cams ensure that the cams are timed correctly.
The next step is to address any nock left/right tears. If you have a nock left tear adjust the rest to the left. If you have a nock right tear adjust the rest to the right. Make these adjustments until you have as little left/right tear as possible. Realize that it may not be possible to remove all nock left/right tears at this point, so don’t get frustrated. A nock left tear, for a right hand shooter, may indicate an under spined (not stiff enough) arrow. You can correct this by increasing the arrow spine (getting a stiffer arrow), decreasing the point weight, shortening the arrow or decreasing the draw weight. The least expensive and quickest solution is to decrease the draw weight. Keep reducing the draw weight until you have a perfect bullet hole tear (NEVER loosen the limb bolts beyond the manufacturers limits). This becomes the maximum draw weight you should shoot your bow for that draw weight and arrow combination. I’ve discovered that for me my maximum draw weight ends up being around 63-64 pounds for my setup of a 28″ 400 spine shaft, 100 gr point. You should end up with the center-shot adjustment being very close to your initial adjustment. If not, something else might be the culprit.
If you’re unable to get a “good tear” make sure that your grip is not the culprit. If your grip is not the problem the cause may be the string/cables or cam lean. If you have access to a bow press you can do this yourself. Remove the string/cables and ensure that they are twisted to the manufacturers specified lengths. Also ensure that there are not issues with cam timing. In all my years of archery I’ve only encountered 1 bow that simply couldn’t be tuned. It turned out to be a problem with one limb of a split limb bow. When I received the replacement bow I had “perfect bullet holes” after only three shots.
Now, go sight in your bow!